How Do You Keep the Bottom Crust of a Chicken Pot Pie from Getting Soggy?
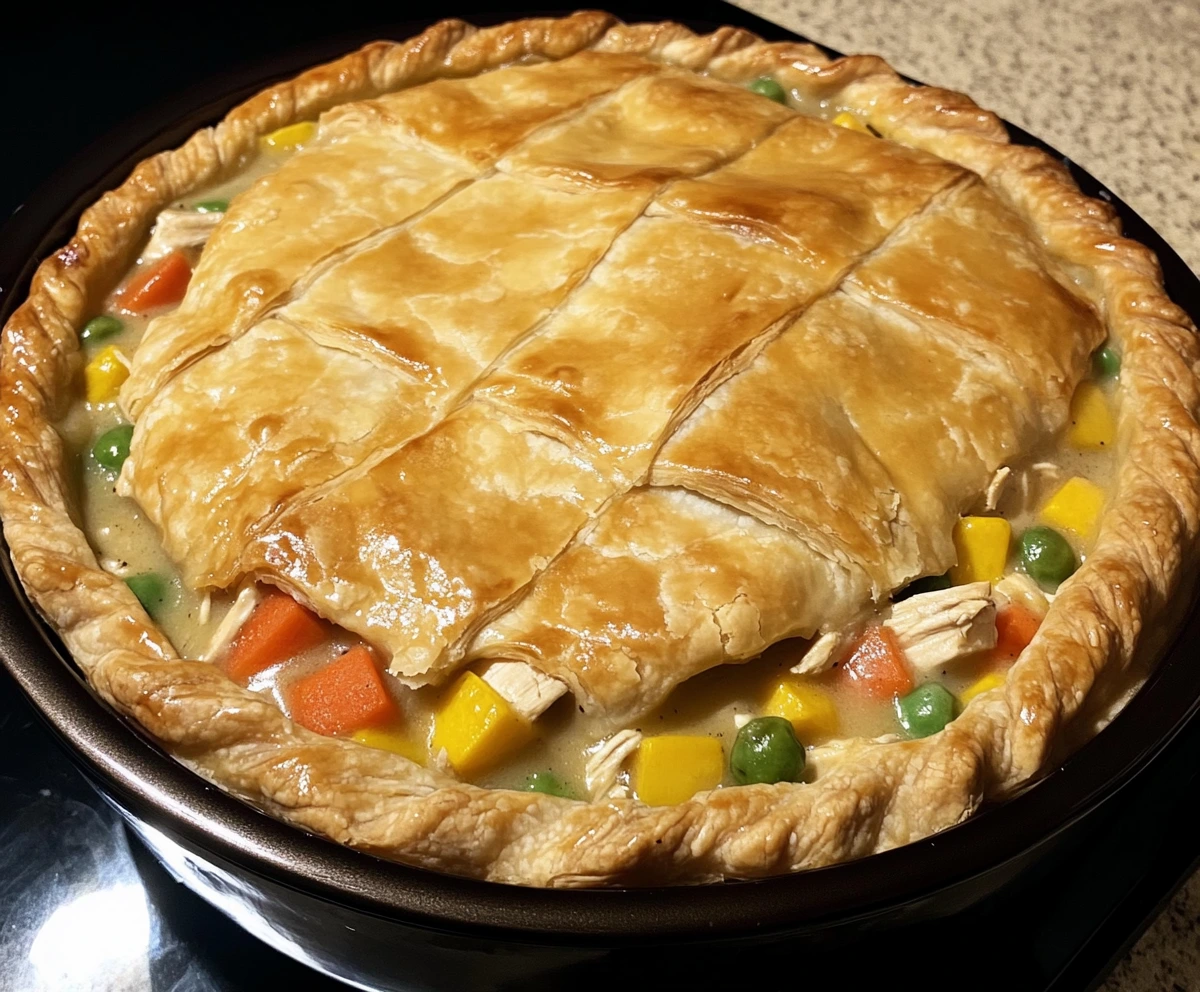
A common frustration when baking chicken pot pie is the soggy bottom crust. If you’ve ever wondered how to keep the bottom crust of a chicken pot pie from getting soggy, you’re not alone. Many cooks struggle with achieving the perfect balance between a juicy filling and a crispy, golden crust. In this guide, we’ll show you how to keep the bottom crust of a chicken pot pie from getting soggy by exploring 12 proven techniques.
In this article, we’ll explore multiple techniques and proven methods to prevent sogginess and achieve a golden, crisp bottom crust every time. From the science behind why crusts get soggy to professional tips on layering, par-baking, and even selecting the right cookware, this guide is your one-stop solution.
Why Does the Bottom Crust of a Chicken Pot Pie Get Soggy?
Understanding the reasons behind a soggy crust is the first step in learning how to keep the bottom crust of a chicken pot pie from getting soggy. The main culprit is moisture from the filling, which releases steam during baking. As the steam rises, it can cause the crust to soften instead of crisping up. We’ll explore how to keep the bottom crust of a chicken pot pie from getting soggy by using methods like blind baking, moisture barriers, and more.
Here are the primary reasons the bottom crust gets soggy:
- Excess moisture from the filling: The liquid in the pie filling escapes as steam during the baking process, soaking into the bottom crust.
- Poor heat distribution: If the heat in the oven doesn’t circulate well or if the pie dish material doesn’t conduct heat effectively, the bottom crust doesn’t cook as fast or evenly.
- No pre-baking (blind baking): If you don’t pre-bake or partially bake the bottom crust before adding the filling, it has less time to firm up and cook thoroughly.
- Warm fillings: If your filling is still warm when you add it to the crust, it releases steam even before the pie is baked, which starts to soak the bottom layer of dough.
Let’s go through various strategies to combat these issues and make your chicken pot pie perfect.
12 Ways to Keep the Bottom Crust of a Chicken Pot Pie from Getting Soggy
1. Blind Baking: The Key to Prevent Soggy Chicken Pot Pie Crust
One of the most effective solutions to avoid a soggy crust is blind baking. Blind baking refers to pre-baking the bottom crust before adding the filling. This creates a barrier, allowing the crust to firm up and bake without absorbing moisture from the filling.
Steps for Blind Baking:
- Preheat the oven: Set your oven to 375°F (190°C).
- Prepare the dough: Roll out the pie dough and press it into your pie dish.
- Poke holes in the dough: Prick the bottom of the dough with a fork. This helps steam escape and prevents air bubbles from forming.
- Use pie weights: Line the dough with parchment paper or foil and add pie weights (or dried beans) to keep the crust flat.
- Bake: Place the pie crust in the oven and bake for 10-15 minutes until the edges are golden brown.
- Remove the weights: Take the pie out of the oven, remove the parchment and weights, and bake for another 5-7 minutes until the bottom is firm and dry.
Blind baking gives the crust a head start, making it less likely to absorb moisture once the filling is added. For more blind baking tips, you can explore this Ultimate Guide to Preventing Soggy Pie Crusts.
2. Egg Wash: How to Stop the Bottom Crust from Getting Soggy
Brushing the pre-baked crust with an egg wash can add an extra layer of protection. This creates a seal on the crust, reducing the chance of moisture from the filling seeping through.
Steps for Applying Egg Wash:
- After blind baking, whisk together one egg and a tablespoon of water.
- Use a pastry brush to spread a thin layer of the mixture over the entire bottom crust.
- Return the crust to the oven for 3-5 minutes until the egg wash sets.
This forms a moisture-resistant layer on the crust, preventing it from becoming soggy when the filling is added. This technique is especially effective for juicy fillings.
3. Adding a Layer of Cheese
A little cheese can go a long way in preventing a soggy crust. Hard cheeses like Parmesan or cheddar melt quickly and act as a barrier between the filling and the crust. This method is similar to egg wash but adds extra flavor to your pie.
How to Use Cheese:
- After pre-baking the crust, sprinkle a thin layer of grated Parmesan or cheddar over the bottom.
- Return the crust to the oven for 3-5 minutes until the cheese melts and forms a seal.
The cheese layer keeps moisture from the filling out while also adding a delicious, savory touch. Try this technique when you want an additional layer of flavor in your pies.
4. Use Breadcrumbs or Ground Nuts
If you don’t want to use cheese, breadcrumbs or ground nuts like almonds or hazelnuts can serve the same purpose. They absorb excess moisture from the filling, keeping the bottom crust crisp.
How to Apply:
- After pre-baking, sprinkle a thin layer of breadcrumbs or ground nuts over the bottom crust.
- Add the filling immediately.
This is a great option for those looking for a low-fat alternative to cheese or egg wash.
5. Thickening the Filling
A thinner filling is more likely to release a lot of liquid as it cooks, which can make your crust soggy. Adding a thickener like flour, cornstarch, or arrowroot can help reduce the amount of liquid that escapes into the crust.
How to Thicken:
- Flour: Add 1-2 tablespoons of flour to your filling.
- Cornstarch: Use 1-2 teaspoons of cornstarch for a clearer, more transparent thickening effect.
- Arrowroot: For a gluten-free option, use arrowroot powder as a thickener.
Thickening the filling will prevent the liquid from escaping, which reduces the risk of it soaking into the bottom crust. A thicker filling holds up better, maintaining a perfect consistency.
6. Cool the Filling Before Adding It to the Crust
A common mistake is adding a hot filling to the pie crust. Hot fillings release steam quickly, which gets trapped under the top crust, making the bottom crust soggy.
Solution:
- Allow the filling to cool completely before adding it to the crust.
- You can also refrigerate the filling for a short time to ensure it is cold.
When the filling is cold, it doesn’t release as much moisture, giving your crust a better chance to bake properly.
7. Par-Baking Instead of Blind Baking
If you don’t want to fully blind bake, par-baking is another option. Par-baking means partially baking the crust, giving it enough structure to hold the filling without soaking up as much moisture.
Par-Baking Steps:
- Bake the crust for about 10 minutes until the edges are just beginning to set but not fully browned.
- Remove the crust, add the filling, and continue baking the entire pie.
Par-baking is a middle-ground solution that works well when the filling requires a longer bake time.
8. Using a Pizza Stone or Baking Steel for Better Heat
For even heat distribution, consider baking your pie on a pizza stone or baking steel. These tools ensure the bottom crust gets enough direct heat, allowing it to crisp up faster.
How to Use a Pizza Stone:
- Place the pizza stone or steel in the oven while it preheats.
- Let the stone or steel heat for 30 minutes before placing your pie on it.
- The stone retains heat, cooking the bottom crust more thoroughly.
A pizza stone is excellent for pies because it ensures that the heat penetrates the bottom crust evenly, resulting in a perfectly crisp pie. Check out this pizza stone guide for more tips on how to use pizza stones in pie baking.
9. Choosing the Right Pie Dish: Metal, Glass, or Ceramic?
The type of pie dish you use can also have a significant impact on the texture of your bottom crust.
- Metal pie dishes: Metal conducts heat very well, which helps bake the bottom crust more thoroughly. The crust will crisp up faster in a metal dish.
- Glass dishes: Glass doesn’t conduct heat as well as metal, but it allows you to see how well the bottom crust is browning.
- Ceramic dishes: Ceramic heats more slowly, so the crust may take longer to cook. However, it provides even heat distribution, which can be beneficial for delicate pies.
Choosing the right pie dish is crucial. For the crispiest crust, metal is your best option, but glass and ceramic work well for more evenly cooked pies.
10. Vent the Top Crust for Steam Release
The top crust also plays a role in keeping the bottom crust crispy. Adding vents to the top crust allows steam to escape, reducing the chance of condensation that can drip down onto the bottom crust.
How to Vent:
- Use a sharp knife to cut 3-5 slits in the top crust before baking.
- Space the slits evenly across the top of the pie to ensure proper air circulation.
Venting allows steam to escape, preventing excess moisture from settling back into the pie, which helps keep the bottom crust crisp.
11. Create Double-Crusted Pies with Care
A double-crusted chicken pot pie is a classic, but it requires extra attention to avoid sogginess. The key to a successful double crust is ensuring that both the top and bottom crusts bake evenly.
Tips for Double-Crusted Pies:
- Blind bake the bottom crust before adding the top crust.
- Brush the bottom crust with egg wash or add a layer of cheese to prevent moisture from seeping through.
- Seal the edges tightly to prevent the filling from leaking out and soaking into the crust.
Double-crusted pies are more prone to sogginess due to the trapped steam, so ensuring proper sealing and venting is essential.
12. Freeze the Crust Before Baking
Another trick to keep your bottom crust crispy is to freeze the pie crust before adding the filling. Freezing the crust helps the fat in the dough solidify, which in turn helps the crust maintain its structure and crisp up better during baking.
How to Freeze the Crust:
- After preparing the pie dough and pressing it into the pie dish, place the dish in the freezer for 20-30 minutes.
- Once the dough is firm, you can either blind bake or add the filling directly.
Freezing the dough helps prevent it from becoming soggy as it cooks. The cold dough takes longer to melt, which keeps the layers of the crust crisp and flaky.
Advanced Techniques and Expert Tips for Perfecting Your Pie Crust
Now that we’ve covered the basics, let’s dive into some advanced tips and techniques used by professional bakers and chefs to ensure a crispy, non-soggy bottom crust.
1. Bake on the Lowest Oven Rack
Placing your pie on the lowest oven rack helps the bottom crust get more direct heat. This ensures that the bottom cooks faster and more thoroughly, reducing the chance of sogginess.
2. Brushing Butter on the Crust
For added flavor and crispness, some bakers like to brush melted butter on the bottom crust before blind baking. This not only enhances the flavor but also creates a moisture-resistant barrier.
3. Experiment with Different Flours
Some flours are better suited for pie crusts than others. For example, using a blend of all-purpose flour and pastry flour can create a lighter, crispier crust that holds up better against moist fillings.
4. Incorporate Vinegar or Vodka into the Dough
Adding a tablespoon of vinegar or vodka to your pie dough can make the crust flakier and more tender. The acid helps relax the gluten, which can result in a more delicate, crisp crust that doesn’t absorb moisture as readily.
FAQs: Solving Common Chicken Pot Pie Crust Problems
1. How do you prevent a soggy bottom crust with juicy fillings?
The most reliable method is to blind bake the bottom crust before adding the filling. You can also add a moisture barrier such as egg wash or cheese and use a thickener like cornstarch or flour in the filling.
2. Should you bake the bottom crust first for pot pie?
Yes, blind baking or at least par-baking the bottom crust before adding the filling is crucial to prevent sogginess.
3. What’s the best way to make a chicken pot pie crispy?
Aside from blind baking, using a pizza stone or baking steel ensures the bottom crust gets even heat and crisps up beautifully. Additionally, using a metal pie dish helps conduct heat better than ceramic or glass.
4. Can you use puff pastry for chicken pot pie, and does it help with sogginess?
Yes, puff pastry can be used for the top crust of a chicken pot pie. It can help prevent sogginess due to its light and flaky texture, but it’s best to combine it with a blind-baked bottom crust or a similar protective layer.
5. Why is my bottom pie crust not cooked?
This could be due to poor heat distribution or not blind baking the crust long enough. Try baking the pie on the lowest oven rack or using a pizza stone to ensure the bottom crust gets sufficient heat.
Conclusion: Combining Techniques for the Perfect Chicken Pot Pie
Achieving the perfect, crispy bottom crust for a chicken pot pie is all about layering techniques. By combining blind baking, egg washes, cheese layers, and ensuring proper heat distribution, you can prevent sogginess and elevate your pot pie to restaurant-quality status. Experiment with these strategies and adapt them to your pie preferences, and soon you’ll master the art of a perfectly crisp crust.
For more tips on making a variety of pies with delicious crusts, check out this detailed pie-making guide and start baking with confidence!

