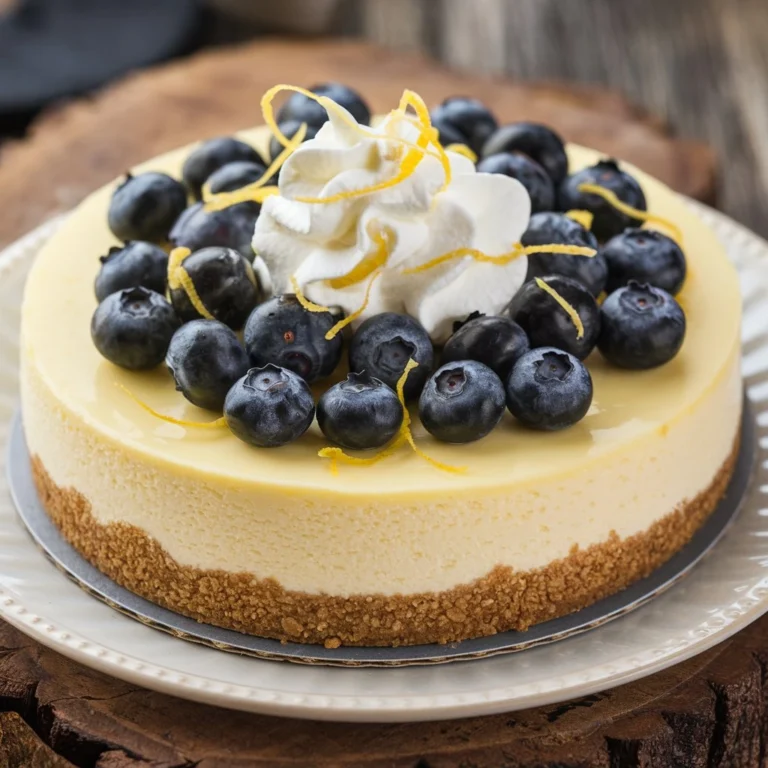
Butterfinger Pie: Recipe, Variations, and Expert Tips
Introduction to Butterfinger Pie
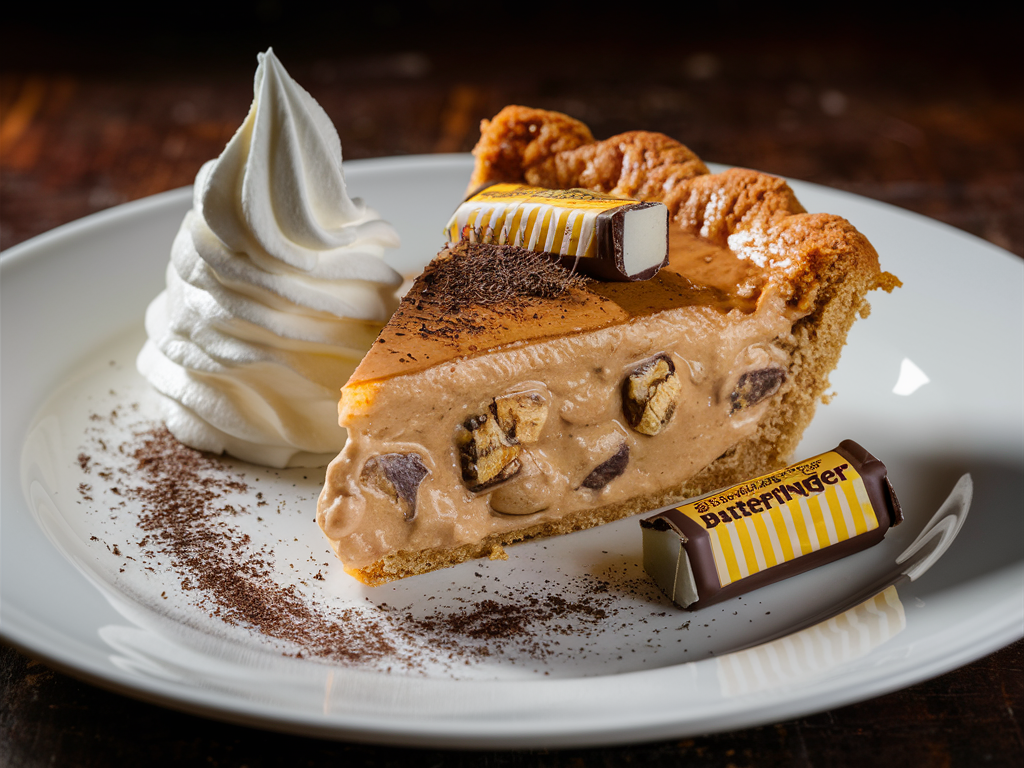
If you’re a fan of desserts that combine creamy, crunchy, and sweet elements into one decadent dish, then Butterfinger Pie is a must-try. This dessert is a delightful fusion of textures and flavors, featuring the unmistakable taste of Butterfinger candy bars. Whether you’re hosting a family gathering, celebrating a special occasion, or simply indulging in a treat for yourself, Butterfinger Pie is sure to impress.
In this comprehensive guide, we’ll walk you through everything you need to know to make the perfect Butterfinger Pie. From a detailed ingredient list to step-by-step instructions, popular variations, and expert tips, this guide will equip you with all the knowledge you need to create a dessert that will have everyone asking for seconds. We’ll also explore nutritional information, serving suggestions, and answer some of the most frequently asked questions about this delectable pie.
Ingredients to Butterfinger Pie
Before we dive into the recipe, let’s take a closer look at the key ingredients that make Butterfinger Pie so special. The combination of these ingredients creates a dessert that is rich, creamy, and satisfyingly crunchy.
Crust Options Butterfinger Pie
The crust is the foundation of your Butterfinger Pie, and choosing the right one can elevate the overall taste and texture of the dessert. Here are the two most popular crust options:
- Oreo Crust: This crust is made by crushing Oreo cookies and mixing them with melted butter. The result is a rich, chocolatey base that pairs perfectly with the creamy filling. The Oreo crust adds an extra layer of flavor, making it a popular choice for chocolate lovers.
- Graham Cracker Crust: For those who prefer a slightly less sweet and more buttery base, the graham cracker crust is an excellent option. It’s made by combining crushed graham crackers with sugar and melted butter. The graham cracker crust offers a subtle, yet delicious contrast to the sweetness of the filling.
Filling Ingredients Butterfinger Pie
The filling is the heart of the Butterfinger Pie, where the creamy and crunchy elements come together. Here’s what you’ll need:
- Cream Cheese: The cream cheese adds a rich, tangy flavor and a smooth texture to the filling. It’s essential to use softened cream cheese to ensure the filling is creamy and lump-free.
- Peanut Butter: Peanut butter not only adds a delightful nutty flavor but also complements the taste of the Butterfinger bars. You can use smooth or crunchy peanut butter, depending on your preference.
- Powdered Sugar: Powdered sugar is used to sweeten the filling. It dissolves easily, ensuring that the filling remains smooth and creamy.
- Whipped Topping: Whipped topping, such as Cool Whip, is folded into the filling to create a light and airy texture. It balances the richness of the cream cheese and peanut butter.
- Butterfinger Candy Bars: The star of the pie, Butterfinger bars, are crushed and mixed into the filling. The candy bars add a satisfying crunch and the signature Butterfinger flavor.
Topping
To finish the pie, additional crushed Butterfinger bars are sprinkled on top. This not only enhances the visual appeal of the pie but also adds extra texture and flavor.
Ingredient List:
- 8 Butterfinger candy bars (crushed)
- 1 Oreo or graham cracker crust
- 8 oz cream cheese, softened
- 1 cup peanut butter
- 1 cup powdered sugar
- 1 cup whipped topping
Using high-quality ingredients, such as freshly made pie crust, can elevate your dessert. For those looking to perfect their pie crust, whether it’s Oreo or graham cracker, Perfect Pie Crust Tips can offer invaluable guidance on achieving the ideal base for your pie.
If you’re planning a dessert spread, consider pairing your Butterfinger Pie with other sweet treats like Earl Grey Cookies for a sophisticated flavor combination that will delight your guests.
Step-by-Step Butterfinger Pie Guide
Now that we’ve covered the ingredients, it’s time to dive into the recipe itself. This step-by-step guide will walk you through the process of making Butterfinger Pie from start to finish. Whether you’re a seasoned baker or a beginner, these instructions are easy to follow and will ensure that your pie turns out perfectly every time.
1. Prepare the Crust
The first step in making Butterfinger Pie is to prepare the crust. Depending on your preference, you can choose between an Oreo crust or a graham cracker crust.
Oreo Crust:
- Begin by crushing the Oreo cookies. You can do this by placing the cookies in a sealed plastic bag and using a rolling pin to crush them into fine crumbs. Alternatively, you can use a food processor for quicker results.
- Once the cookies are crushed, transfer them to a mixing bowl and add melted butter. Stir until the crumbs are evenly coated with butter.
- Press the cookie mixture into the bottom and sides of a pie dish, ensuring that it forms an even layer.
- Place the crust in the refrigerator to chill while you prepare the filling.
Graham Cracker Crust:
- Crush the graham crackers into fine crumbs using a rolling pin or food processor.
- In a mixing bowl, combine the graham cracker crumbs with sugar and melted butter. Stir until the mixture is well combined.
- Press the graham cracker mixture into the bottom and sides of a pie dish, creating an even layer.
- Chill the crust in the refrigerator while you prepare the filling.
2. Make the Filling
With the crust prepared, it’s time to make the creamy, peanut buttery filling that will be the star of your Butterfinger Pie.
- In a large mixing bowl, beat the softened cream cheese until it’s smooth and creamy. It’s important to ensure there are no lumps in the cream cheese, as this will affect the texture of the filling.
- Add the peanut butter and powdered sugar to the cream cheese, and continue to beat the mixture until it’s fully combined and smooth.
- Fold in the whipped topping gently, being careful not to deflate the mixture. The whipped topping will add lightness to the filling, giving it a mousse-like texture.
- Finally, fold in the crushed Butterfinger candy bars, ensuring they are evenly distributed throughout the filling.
3. Assemble the Pie
Now that the filling is ready, it’s time to assemble your Butterfinger Pie.
- Remove the chilled crust from the refrigerator and pour the filling into the crust. Use a spatula to spread the filling evenly, smoothing the top.
- Sprinkle additional crushed Butterfinger bars over the top of the pie for added texture and decoration.
- Place the pie in the refrigerator and let it chill for at least 4 hours, or until the filling is set. Chilling the pie allows the flavors to meld together and makes slicing easier.
For more inspiration on using peanut butter in desserts, check out these Peanut Butter Desserts that will complement your Butterfinger Pie creation.
4. Serve and Enjoy
Once the pie has chilled and set, it’s ready to be served. Use a sharp knife to slice the pie into wedges, and serve each slice on a dessert plate. Butterfinger Pie is delicious on its own, but you can also enhance it with a dollop of whipped cream, a drizzle of chocolate sauce, or a scoop of vanilla ice cream.
Popular Variations of Butterfinger Pie
One of the best things about Butterfinger Pie is its versatility. The basic recipe can be easily adapted to suit different tastes and dietary preferences. Below are some popular variations of Butterfinger Pie that you might want to try.
No-Bake Butterfinger Pie
If you’re looking for a quick and easy dessert, the no-bake Butterfinger Pie is the way to go. This version skips the baking step entirely, making it perfect for hot summer days or when you’re short on time.
Ingredients:
- 8 Butterfinger candy bars (crushed)
- 1 Oreo or graham cracker crust
- 8 oz cream cheese, softened
- 1 cup peanut butter
- 1 cup powdered sugar
- 1 cup whipped topping
Instructions:
- Follow the steps for preparing the crust as outlined above. Since this is a no-bake version, there’s no need to bake the crust.
- Prepare the filling by beating the cream cheese, peanut butter, and powdered sugar together until smooth. Fold in the whipped topping and crushed Butterfinger bars.
- Pour the filling into the prepared crust, and sprinkle additional crushed Butterfinger bars on top.
- Chill the pie in the refrigerator for at least 4 hours before serving.
This no-bake version is just as delicious as the original and is perfect for those who prefer a lighter, airier texture.
Peanut Butter Butterfinger Pie
For peanut butter lovers, this variation of Butterfinger Pie takes the nutty flavor to the next level. By increasing the amount of peanut butter in the filling, you can create a pie that is rich, creamy, and bursting with peanut butter flavor.
Ingredients:
- 8 Butterfinger candy bars (crushed)
- 1 Oreo or graham cracker crust
- 8 oz cream cheese, softened
- 1 ½ cups peanut butter (smooth or crunchy)
- 1 cup powdered sugar
- 1 cup whipped topping
Instructions:
- Prepare the crust as directed above.
- In a mixing bowl, beat the cream cheese and peanut butter together until smooth and creamy.
- Add the powdered sugar and continue to beat until well combined.
- Fold in the whipped topping and crushed Butterfinger bars.
- Pour the filling into the crust, and top with additional crushed Butterfinger bars.
- Chill the pie in the refrigerator for at least 4 hours before serving.
For an extra indulgent touch, you can drizzle the pie with melted chocolate or swirl Nutella into the filling before chilling. This version of Butterfinger Pie is sure to be a hit with anyone who loves the combination of chocolate and peanut butter.
Four-Ingredient Butterfinger Pie
If you’re short on time or ingredients, this four-ingredient version of Butterfinger Pie is a lifesaver. It’s quick, easy, and still delivers on flavor.
Ingredients:
- 8 Butterfinger candy bars (crushed)
- 1 Oreo or graham cracker crust
- 8 oz cream cheese, softened
- 1 cup whipped topping
Instructions:
- Prepare the crust as directed above.
- In a mixing bowl, beat the cream cheese until smooth.
- Fold in the whipped topping and crushed Butterfinger bars.
- Pour the filling into the crust, and sprinkle additional crushed Butterfinger bars on top.
- Chill the pie in the refrigerator for at least 4 hours before serving.
This simplified version of Butterfinger Pie is perfect for when you need a quick and easy dessert that still tastes amazing. It’s also a great option for beginner bakers who want to try their hand at making a pie without the need for complicated ingredients or techniques.
For a truly unique flavor experience, try pairing this pie with other adventurous desserts like Pumpkin Banana Loaf, which offers a surprising blend of fall flavors that complement the sweetness of Butterfinger.
Expert Tips for the Perfect Butterfinger Pie
Creating the perfect Butterfinger Pie requires a bit of know-how. To help you achieve the best results, here are some expert tips to keep in mind:
Choosing the Right Crust
The choice between an Oreo crust and a graham cracker crust comes down to personal preference. If you’re a fan of chocolate, the Oreo crust is the way to go. It adds a rich, chocolatey flavor that pairs beautifully with the Butterfinger filling. On the other hand, if you prefer a more subtle, buttery flavor, the graham cracker crust is an excellent choice. It offers a nice contrast to the sweetness of the filling and allows the Butterfinger flavor to shine.
Crushing Butterfingers
Crushing Butterfinger bars can be a bit tricky, especially if you want to avoid making a mess. Here’s a simple tip: freeze the Butterfinger bars for about 30 minutes before crushing them. This will make them easier to break into small pieces without melting or sticking. Place the frozen bars in a sealed plastic bag and use a rolling pin to crush them into your desired consistency. For more detailed advice, explore How to Crush Candy for Desserts.
Achieving a Creamy Filling
To ensure that your filling is smooth and creamy, it’s important to start with softened cream cheese. Cold cream cheese can be difficult to mix and may result in lumps in the filling. Allow the cream cheese to sit at room temperature for about 30 minutes before using it. If you’re in a hurry, you can soften the cream cheese by microwaving it on low power for 10-15 seconds.
When folding in the whipped topping, be gentle to avoid deflating the mixture. The whipped topping adds lightness to the filling, giving it a mousse-like texture. Use a spatula to fold the topping in slowly and evenly.
Nutritional Breakdown
While Butterfinger Pie is undeniably delicious, it’s also a rich and indulgent dessert. Understanding its nutritional content can help you make informed choices about portion sizes and serving frequency.
Calories
Butterfinger Pie is relatively high in calories, with approximately 400 calories per slice (based on 8 slices per pie). This calorie count is due to the combination of cream cheese, peanut butter, sugar, and Butterfinger bars.
Key Nutrients
In addition to being high in calories, Butterfinger Pie is also rich in fat and sugar. The cream cheese and peanut butter contribute to the fat content, while the powdered sugar and candy bars add to the sugar content. While this pie is a treat best enjoyed in moderation, it’s certainly worth the indulgence for special occasions.
Healthier Alternatives
If you’re looking to reduce the calorie content of your Butterfinger Pie, there are a few adjustments you can make:
- Light Cream Cheese: Substitute regular cream cheese with light or reduced-fat cream cheese to cut down on calories and fat.
- Natural Peanut Butter: Use natural peanut butter without added sugars or hydrogenated oils. This can reduce the sugar and fat content while adding more protein.
- Sugar Substitutes: Consider using a sugar substitute like Stevia or erythritol in place of powdered sugar. This can help lower the overall sugar content of the pie.
- Portion Control: Serve smaller slices to reduce calorie intake. Pair the pie with fresh fruit or a light dessert to balance the richness.
Serving Suggestions and Pairings
Butterfinger Pie is a versatile dessert that can be served on a variety of occasions, from casual family dinners to elegant celebrations. Here are some serving suggestions and pairings to enhance your Butterfinger Pie experience.
Occasions
Butterfinger Pie is a crowd-pleaser that’s perfect for birthdays, holidays, and potlucks. Its rich, creamy filling and crunchy topping make it a dessert that’s sure to impress. Consider serving it as the centerpiece of a dessert table, surrounded by other sweet treats.
Beverage Pairings
Pairing Butterfinger Pie with the right beverage can enhance its flavors and make the dining experience even more enjoyable. Here are some beverage options that complement the pie:
- Coffee: A strong cup of coffee or espresso is a classic pairing for rich desserts like Butterfinger Pie. The bitterness of the coffee helps balance the sweetness of the pie.
- Milk: A glass of cold milk is a simple yet satisfying choice. The milk’s creamy texture complements the richness of the pie and provides a refreshing contrast.
- Dessert Wine: For a more sophisticated pairing, try serving Butterfinger Pie with a sweet dessert wine, such as Moscato or Port. The wine’s sweetness will echo the flavors of the pie, while its acidity will help cut through the richness.
Garnishing Ideas
To make your Butterfinger Pie even more visually appealing, consider adding some garnishes before serving:
- Whipped Cream: A dollop of freshly whipped cream adds a light, airy texture to each slice.
- Chocolate Drizzle: Melt some chocolate and drizzle it over the top of the pie for an extra layer of decadence.
- Crushed Butterfinger Bars: Sprinkle more crushed Butterfinger bars on top for added crunch and flavor.
- Caramel Sauce: A drizzle of caramel sauce adds a buttery sweetness that complements the Butterfinger flavor.
For a fun twist, consider serving Butterfinger Pie alongside other shareable treats like Muddy Buddies, which are perfect for parties and gatherings.
Frequently Asked Questions (FAQs)
To help you perfect your Butterfinger Pie and address any potential concerns, here are answers to some of the most frequently asked questions about this dessert.
How long can Butterfinger Pie be stored?
Butterfinger Pie can be stored in the refrigerator for up to 5 days. Be sure to cover it with plastic wrap or store it in an airtight container to prevent it from drying out or absorbing other odors from the fridge. If you’re planning to store the pie for a longer period, consider freezing it. To freeze, wrap the pie tightly in plastic wrap and then in aluminum foil. The pie can be frozen for up to 2 months. When ready to serve, thaw the pie in the refrigerator overnight.
Can I use other candy bars instead of Butterfinger?
Yes, you can substitute Butterfinger with other candy bars like Snickers, Twix, or Heath. However, keep in mind that this will alter the flavor profile of your pie. Each candy bar has its own unique taste and texture, so choose one that complements the other ingredients in the filling.
Is Butterfinger Pie gluten-free?
To make Butterfinger Pie gluten-free, you’ll need to use a gluten-free crust. While Butterfinger candy bars themselves do not contain gluten, cross-contamination may occur during manufacturing, so it’s important to check the label if you have a severe gluten allergy. For the crust, you can either make your own using gluten-free graham crackers or cookies or purchase a pre-made gluten-free crust from the store.
Can I make Butterfinger Pie in advance?
Absolutely! Butterfinger Pie is a great make-ahead dessert. In fact, making it a day ahead allows the flavors to meld together, resulting in an even more delicious pie. After assembling the pie, cover it tightly with plastic wrap and store it in the refrigerator. When ready to serve, simply remove the pie from the fridge, slice, and enjoy. If you’re planning to serve the pie at a party or gathering, making it in advance will save you time and stress on the day of the event.
Can I make Butterfinger Pie without cream cheese?
If you’re not a fan of cream cheese or are looking for a dairy-free alternative, you can substitute the cream cheese with other ingredients. One option is to use a combination of coconut cream and dairy-free cream cheese. Coconut cream will add richness and creaminess to the filling, while dairy-free cream cheese will provide a similar texture to regular cream cheese. Another option is to use a combination of whipped topping and pudding mix, which will create a lighter, mousse-like filling.
Conclusion
Butterfinger Pie is a dessert that’s as fun to make as it is to eat. Whether you stick to the classic recipe or experiment with variations, this pie is sure to delight everyone who tries it. With its rich, creamy filling, crunchy topping, and customizable crust options, Butterfinger Pie is a dessert that can be adapted to suit any occasion or taste preference.
The expert tips and variations provided in this guide will help you create a Butterfinger Pie that’s perfect for your needs. Whether you’re serving it at a family gathering, a holiday celebration, or just as a special treat for yourself, this pie is sure to be a hit.
Don’t forget to pair your Butterfinger Pie with complementary desserts like Pumpkin Banana Loaf or Muddy Buddies for a truly indulgent dessert experience. And remember, the key to a great pie is high-quality ingredients, so take the time to choose the best options available.
So go ahead, gather your ingredients, and start baking! Your delicious Butterfinger Pie is just a few steps away.

