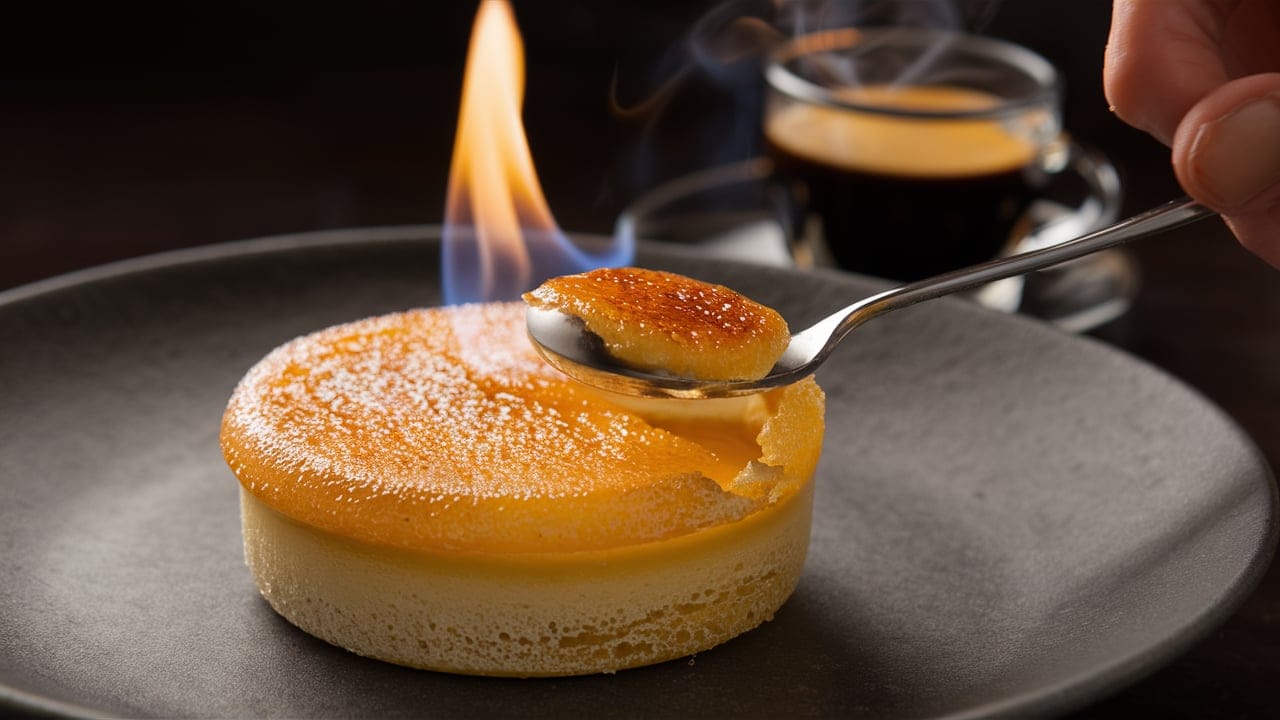
How to Caramelize Brulee?
Crème Brûlée is a dessert that has captivated food enthusiasts for centuries. It’s the kind of dish that evokes a sense of sophistication and mastery in the kitchen, with its creamy custard base and the crisp, caramelized sugar topping that creates a satisfying crack as your spoon breaks through it. However, achieving that perfect caramelized top can be daunting, especially if you’re not familiar with the science behind it. This comprehensive guide will take you through every step of the process, from understanding the ingredients to mastering the techniques needed to create the caramelize brulee.
Understanding the Basics and Preparation to Caramelize Brulee
Introduction to Caramelize Brulee
Crème Brûlée, which translates to “burnt cream” in French, is a classic dessert that dates back to at least the 17th century. It has been a staple in French cuisine for hundreds of years, and its popularity has spread worldwide. The beauty of Crème Brûlée lies in its simplicity—few ingredients, but each plays a vital role in creating a dish that is more than the sum of its parts. The contrast between the smooth, creamy custard and the crisp, caramelized sugar is what makes this dessert so memorable.
The history of caramelize brulee is rich and varied, with claims of its origin coming from different parts of Europe, including France, England, and Spain. Regardless of where it began, the modern version of Crème Brûlée as we know it today is distinctly French. The dish has become synonymous with elegance and is often served in fine dining establishments.
Ingredients and Equipment Needed to Caramelize Brulee
To create the perfect Crème Brûlée, you need to start with the right ingredients and tools. The ingredients are simple but must be of high quality to achieve the best results.
Ingredients Caramelize Brulee:
- Heavy Cream: The base of the custard, heavy cream provides the rich, creamy texture that Crème Brûlée is known for. Ensure you’re using fresh, high-fat cream.
- Egg Yolks: Egg yolks are the thickening agent in the custard. They give the Crème Brûlée its smooth, velvety texture. Use large, fresh eggs for the best results.
- Granulated Sugar: Sugar is used both in the custard and for the caramelized topping. The granulated sugar you use should be fine enough to dissolve easily into the custard mixture.
- Vanilla Extract or Vanilla Bean: Vanilla is the primary flavoring in traditional Crème Brûlée. While extract works well, using a vanilla bean adds an extra depth of flavor and those beautiful vanilla flecks in the custard.
- Salt: Just a pinch of salt enhances the flavors of the other ingredients and balances the sweetness of the sugar.
Equipment Caramelize Brulee:
- Ramekins: Small, shallow dishes that hold the custard as it bakes. Choose ramekins with a flat surface for an even caramelized topping.
- Kitchen Torch: The essential tool for caramelizing the sugar. A torch allows for precise control, ensuring that the sugar melts evenly without burning.
- Mixing Bowls: You’ll need a few bowls to whisk together your ingredients.
- Whisk: A whisk is essential for combining the egg yolks and sugar smoothly.
- Fine Mesh Sieve: To ensure a smooth custard, it’s important to strain the mixture before pouring it into the ramekins.
- Baking Tray and Water Bath: The ramekins are placed in a baking tray filled with water to create a gentle, even heat that prevents the custard from curdling.
The Science Behind Caramelization Caramelize Brulee
Caramelization is the process that occurs when sugar is heated to a high temperature, causing it to break down and form new compounds that give it a rich, complex flavor. This is the magic behind the crispy, glass-like top of Crème Brûlée. The science of caramelization involves both physical and chemical changes.
When sugar is heated, it first melts into a syrup and then starts to turn golden as it reaches temperatures between 320°F and 350°F (160°C and 177°C). As it continues to cook, the sugar molecules begin to break down and re-form into hundreds of new compounds, creating the deep, complex flavors associated with caramel. These compounds include acids, esters, and volatile chemicals that contribute to the rich aroma and taste.
The key to perfect caramelization is control. Too little heat and the sugar won’t caramelize properly, resulting in a grainy texture. Too much heat, and it can quickly burn, turning bitter. A kitchen torch gives you the ability to apply direct heat precisely where it’s needed, allowing for an even caramelization across the top of your Crème Brûlée.
For a more in-depth look at the science behind caramelization, you can explore this article on The Science of Caramelization. It provides a thorough explanation of the chemical reactions at play, giving you a better understanding of what’s happening when you torch the sugar.
Preparing the Crème Brûlée Base
The foundation of any good Crème Brûlée is its custard. This rich, creamy mixture is surprisingly easy to make, but it requires attention to detail to ensure it turns out perfectly.
Step 1: Heat the Cream
Start by pouring the heavy cream into a saucepan. If you’re using a vanilla bean, split it down the middle and scrape out the seeds, adding both the seeds and the pod to the cream. Slowly heat the cream over medium heat until it just begins to simmer. Be careful not to let it boil, as this can cause the cream to curdle. Once the cream is hot, remove it from the heat and let it steep for 15 minutes to infuse the vanilla flavor.
Step 2: Whisk the Egg Yolks
While the cream is steeping, whisk together the egg yolks and sugar in a large mixing bowl. The mixture should be pale yellow and slightly thickened. The sugar helps to break down the proteins in the egg yolks, creating a smooth consistency that will result in a velvety custard.
Step 3: Temper the Eggs
Tempering is the process of gradually raising the temperature of the egg mixture to prevent the yolks from curdling when they’re combined with the hot cream. Slowly pour a small amount of the warm cream into the egg mixture while whisking continuously. Once the eggs have been tempered, you can gradually whisk in the rest of the cream.
Step 4: Strain the Custard
To ensure a perfectly smooth custard, strain the mixture through a fine-mesh sieve into a clean bowl. This will remove any bits of egg that may have curdled during the tempering process, as well as any remaining vanilla pod pieces.
Step 5: Pour and Bake
Divide the custard evenly among the ramekins, filling them about three-quarters full. Place the ramekins in a baking tray, then fill the tray with hot water until it reaches halfway up the sides of the ramekins. This water bath, or bain-marie, provides gentle, even heat, ensuring that the custard cooks slowly and evenly. Bake the custards at 325°F (160°C) for 35-40 minutes, or until they are just set but still have a slight wobble in the center.
Step 6: Chill the Custards
Once the custards are baked, remove them from the water bath and let them cool to room temperature. Then, transfer them to the refrigerator to chill for at least 4 hours, or overnight. Chilling the custards firms up their texture and prepares them for the caramelization process.
For alternative methods of caramelizing sugar, you might want to explore alternative caramelization methods, which include using the broiler method for a more accessible approach.
Caramelization Process and Serving Tips
How to Caramelize Brulee the Sugar Top
Caramelizing the sugar topping is the final and perhaps most crucial step in making Crème caramelize brulee. The goal is to create a thin, even layer of caramelized sugar that hardens into a crisp shell. Here’s how to achieve that perfect top:
Step 1: Sprinkle Sugar
Before you begin caramelizing, sprinkle a thin, even layer of granulated sugar over the surface of each chilled custard. You can use either white granulated sugar or a fine caster sugar for this step. Some chefs prefer to use a combination of sugars, including brown sugar, for a slightly different flavor profile. However, white sugar is traditional and caramelizes evenly.
Step 2: Use the Torch
Hold your kitchen torch about 2 inches above the sugar layer. Begin by igniting the torch and adjusting the flame to medium. Move the torch in a slow, circular motion over the surface of the sugar. The sugar will begin to melt and bubble as it heats up, eventually turning golden brown. Continue to move the torch evenly across the surface to ensure that all the sugar melts and caramelizes without burning.
Step 3: Let it Set
After caramelizing the sugar, allow the custards to sit for a minute or two. This gives the sugar time to cool and harden into a crisp shell. The result should be a beautiful, glassy top that shatters when tapped with a spoon.
Alternative Caramelization Methods
If you don’t have a kitchen torch, you can use your oven’s broiler to caramelize the sugar. Place the ramekins under a preheated broiler on high heat, about 3-4 inches from the heating element. Watch closely, as the sugar can go from caramelized to burnt very quickly. This method is less precise than using a torch, but it can still produce good results.
For more detailed instructions on using alternative methods, check out alternative caramelization methods.
Troubleshooting Common Issues
Even with careful attention, issues can arise during the caramelization process. Here’s how to troubleshoot some common problems:
- Sugar Not Caramelizing: If your sugar isn’t melting evenly, it could be due to uneven sugar distribution or insufficient heat. Make sure the sugar is spread evenly and that your torch or broiler is adequately preheated.
- Uneven Caramelization: If some areas of the sugar melt faster than others, try adjusting your technique. Keep the torch moving constantly and evenly over the surface.
- Burnt Sugar Top: If the sugar burns, it will taste bitter. If this happens, you can gently scrape off the burnt sugar with a spoon and try again with a fresh layer of sugar. To prevent burning, always keep the torch moving and avoid holding it too close to the sugar.
Creative Variations of Crème Brûlée
While traditional Crème Brûlée is flavored with vanilla, there are countless variations you can explore to put your own spin on this classic dessert. Here are a few ideas:
Coffee Crème Brûlée: Add a shot of espresso or a tablespoon of instant coffee granules to the cream while it’s heating. The result is a rich, mocha-flavored custard that pairs beautifully with the caramelized sugar topping.
Lavender Crème Brûlée: For a floral twist, add a teaspoon of dried lavender buds to the cream as it heats. Be sure to strain the custard well to remove the buds before baking. Lavender adds a subtle, aromatic flavor that is both elegant and unique.
Chocolate Crème Brûlée: Melt 2 ounces of dark chocolate into the cream while it’s heating. Chocolate adds a rich depth of flavor and a slight bitterness that contrasts beautifully with the sweet sugar topping.
Spiced Crème Brûlée: Infuse the cream with warm spices like cinnamon, nutmeg, or cardamom for a cozy, wintertime dessert. Spiced Crème Brûlée is perfect for the holiday season and pairs well with a dusting of powdered sugar or a dollop of whipped cream.
Fruit-Infused Crème Brûlée: Add a layer of fruit puree, such as raspberry or passionfruit, to the bottom of the ramekins before pouring in the custard. The tartness of the fruit complements the sweetness of the custard and caramelized sugar.
If you’re interested in exploring other creative dessert ideas, you might enjoy banana zucchini bread recipes, which offer a delightful twist on a classic favorite.
Serving and Presentation Tips
Crème Brûlée is a dessert that deserves to be presented with care. Here are some tips to ensure your dessert not only tastes great but looks stunning as well:
- Garnishing: While Crème Brûlée is traditionally served without any garnish, you can add a touch of color and flavor by topping it with fresh berries, a sprig of mint, or a light dusting of powdered sugar.
- Cooling: After caramelizing the sugar, let the ramekins cool for a few minutes before serving. This allows the custard to firm up slightly and the caramelized sugar to harden into a crisp shell.
- Serving: Serve Crème Brûlée with a small spoon so that guests can enjoy the satisfying crack of the sugar topping. It’s also a good idea to serve the ramekins on small plates or saucers to make them easier to handle.
For those interested in perfecting their dessert presentation, learning from strawberry bread recipes can provide valuable insights into how to create visually appealing dishes.
FAQs About Caramelizing Brûlée
- Why isn’t my sugar caramelizing evenly?
- Uneven caramelization can result from a few factors, such as uneven sugar distribution or inconsistent torch movement. Make sure the sugar is spread in an even layer across the custard surface, and keep the torch moving to avoid hot spots.
- Can I caramelize Crème Brûlée without a torch?
- Yes, you can use your oven’s broiler to caramelize the sugar, but be cautious as it’s easy to burn the sugar with this method. Place the ramekins under a preheated broiler, keeping a close eye on them to prevent burning.
- How long does caramelized Crème Brûlée last?
- Crème Brûlée is best enjoyed shortly after caramelizing the sugar. While the custard can be made ahead of time and stored in the refrigerator for up to 2 days, the sugar topping will lose its crispness over time. It’s best to caramelize the sugar just before serving.
- Can I make Crème Brûlée ahead of time?
- Yes, you can prepare the custard a day in advance and store it in the refrigerator. Just make sure to cover the ramekins with plastic wrap to prevent them from absorbing any odors. Caramelize the sugar topping just before serving to ensure it’s crisp.
- What if I don’t have ramekins?
- If you don’t have ramekins, you can use any small, oven-safe dish. Just be sure the dishes are shallow enough to allow for even baking and caramelization. The cooking time may vary slightly depending on the size and material of the dish.
Conclusion: Mastering Crème Brûlée
Creating the caramelize brulee is an art that combines simple ingredients with precise techniques. By following the steps outlined in this guide, you can achieve a rich, creamy custard topped with a beautifully caramelized sugar shell. Whether you stick with the classic vanilla flavor or experiment with creative variations, caramelize brulee is a dessert that is sure to impress.
For more inspiration and dessert ideas, consider exploring related recipes like the banana-brownie recipe featured on Aurelia Recipes. With practice and a bit of experimentation, you’ll soon master the art of caramelize brulee, making it a staple in your dessert repertoire. Happy cooking!